How To Install A Can LightPosted by Eli Larreau
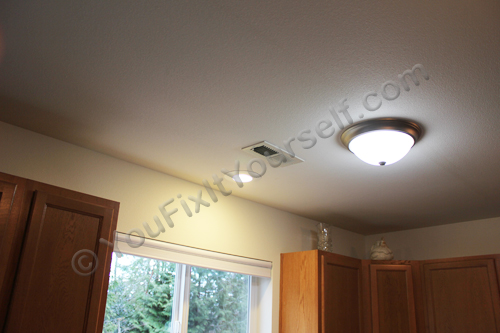
Shortly after we moved into our new home we realized that there was no light above the kitchen sink. The lighting in the kitchen was behind us when we were standing at the sink and there was a shadow cast across the it. We decided to install a recessed can light over the sink. We did not want to put the can light on its own switch because that would be much more difficult and we would have to cut into the sheetrock and then repair it. We knew before we started that we would be able to fish a wire from one light fixture to the new can light location and this would make for an easy installation, so that's the way we did it. We are not electricians and are only showing what we did to install our light.

Before you start you need to make sure you are not going to overload the circuit. Figure out how many lights are already on the circuit and calculate the watts being used. Then figure out how many watts the circuit can handle. Subtract the watts being used from the watts available and see if there is enough room to add another light. You also need to make sure that you are working with standard copper wiring. If the wire is not copper then you should consult a licensed electrician. And you need to figure out which circuit breaker the lights are on so you can turn it off. Don't trust the labels in your breaker box - always test to make sure the circuit is really off. Working with lights, you can test by simply turning the light switch on and off. If they don't come on then you got the right breaker. Turn the light switch off just to make sure, and then put tape over the light switch so nobody accidentally turns it back on. Then use an electrical tester before touching any wires just to make sure. With the power off we are ready to start:
|
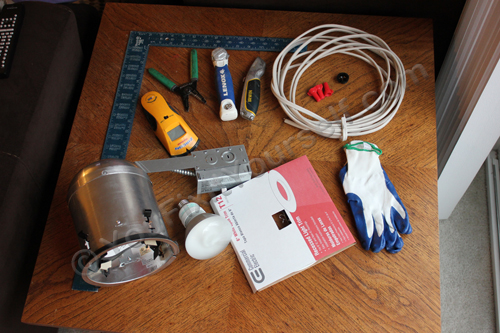
Materials list:
- Remodel recessed can light housing
- Can light trim ring
- Wire clamp
- Light bulb
- Electrical wire
- Wire nuts
Tools you will need:
- Electrical tester
- Wire cutter/stripper
- Razor knife
- Key hole saw
- Pencil
- Screw drivers
|
|
Other things you may want to have:
- Gloves
- Stud finder
- Awl
- Measuring tools
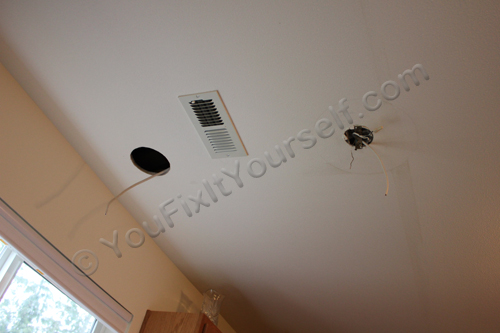
The first thing you want to do is locate where the new light will go. The recessed can light housing should come with a paper template inside of it which also has instructions for installation. We used an awl to hold the template in place while tracing around it. If you are replacing an existing light fixture you can force the old electrical box into the ceiling until it breaks loose. Then after you cut out the hole for the recessed can light housing, you can pull the old box out through the hole. If you aren't sure where the framing is on the other side of the sheetrock you can use a stud finder to make sure you don't locate your new light where a joist or truss is. You also need to make sure you can get a wire to your new hole. If the light is going up into attic space then this shouldn't be a problem. If it is a downstairs ceiling then the can light housing will be in the floor system for the upstairs. If the joists run the wrong direction then it will be more difficult to get your wire from an existing electrical box to your new one. Our project was in the upstairs floor system but we knew that it was an open truss system so access was not a problem.

We cut out the hole using a keyhole saw. You can use a razor knife if you want but it is a lot harder to get a razor knife to penetrate all the way through the sheetrock. To get the keyhole saw started you hold the point against the sheetrock where you want to start and then hit the end of the handle driving the point through the sheetrock. Once through you just saw around your line with short even strokes. Make sure you follow your line carefully. If you make the hole too large then the recessed can light housing will not stay flush with the ceiling and will push up into the space above. If your installation is in an attic space then you may have insulation above when you cut out your hole. Be aware that you might have stuff falling down on you and you may have a bit of a mess to clean up when you are done. After the hole is cut out you should test fit the new can light housing in the hole. If it is too tight you can mark around the hole where it is preventing the recessed can light housing from fitting. Then use the keyhole saw to cut the hole a little bigger. Make sure you don't cut too much off. You want the housing to fit in the hole but you want it to be snug.

With your hole cut out you need to get your power wire from the existing power box to your new hole. We punched out one of the knock outs for running electrical wire in the existing electrical box and pushed a wire through the hole in the direction of the new can light. Then reached up in the new hole and felt around until we found the wire. At this point we can hook up the electrical in the old box. Again, make sure the power is off! To connect the wires you just match up the wires by color: Black to black, white to white, and ground to ground (bare copper or green). Twist the wire nuts on until you can't twist anymore. I usually twist until the wires twist together the length of the wires. Then hold the wire nut and tug each wire to make sure they can't come out. The wire nut should hide all of the exposed copper on the black and white wire.
Note: If you find a red wire and not a black one then it is probably the power wire and should be connected to the black wire going to the new recessed can light fixture. Use an electrical tester to make sure. Also, if you find red wires and black wires in the electrical box they are probably both hot wires but only one will be running the light. Use the one that was already running the light. The other one is probably just a connection to run power somewhere else and may not even be on the same circuit. If you are confused and not sure what you are looking at, call an electrician. You don't want to guess when it comes to electrical work.
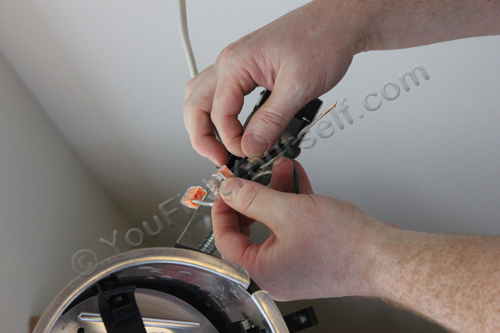
Now you need to get the power into the electrical box on the recessed can light housing. There is a cover that comes off so you can work on the wiring in the box. Remove that cover. You also need to remove one of the knock outs. The knock out is a circle that is punched into the side of the metal electrical box on the recessed can light housing. They often have a slot cut into the middle of them to make it easier to knock them out. Put a screwdriver in the slot and pry back and forth until the knock out breaks loose. We stripped the wires before putting them through the knockout hole. You need a wire clamp to hold the wire in place in the knock-out hole. There are different types that you can get. The one we used is black plastic and squeezes the wire when pushed into the knock-out hole. If you look at the picture above with the tools and supplies, it is in the center of the coil of electrical wire. You can also get metal ones that use screws to clamp onto the wire and have a large nut that holds them to the electrical box.

Now connect the wires matching up the colors: Black to black, white to white, and ground to ground (bare copper or green wires are ground wires). The recessed can light housing we used has push in wire connectors. They are super easy to use. Just push the wire in one of the holes, like pluging a cord into an outlet. Yours may just have wires and you will need to connect the wires using wire nuts. Give each wire a tug to make sure they are being securely held by the wire nut. If a wire pulls out then it wasn't right. When you are done connecting the wires, snap the cover back on the electrical box. You are now ready to install the recessed can light housing into the ceiling.
Stick the electrical box in through the hole first and then tip the housing upright so you can push it up until it is flush with the ceiling.
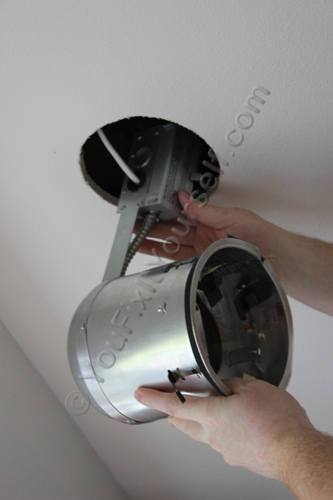
The next step is sometimes difficult. There are clips around rim of the can light housing that push down on the ceiling and hold the housing securely to the ceiling. The one in the pictures has 4 of them. You can see one of them in the above picture sticking out by my finger. When they stick out like this they push down on the top of the ceiling board. You have to push them all in while you slide the housing up through the hole and then push each of those clips back out to hold against the ceiling. Getting them to push out is sometimes difficult but necessary to hold the housing in place. They should click into place and stay extended when they are done right.
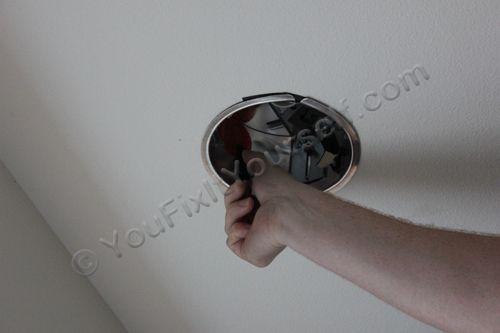
With the housing in place you are ready to put the trim ring in place. It has two springs that hook onto the inside of the recessed can light housing. The trim ring can be moved around to center it.
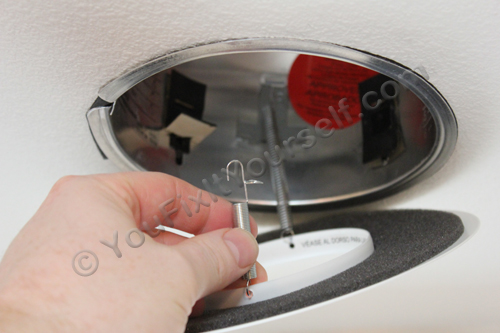
We adjusted our light so the bulb came out flush with the trim ring. It can be adjusted in or out to adjust how much area the light covers. Put it up in farther and it will shine on a smaller circle. On ours there was a wing nut holding a bracket that moved the socket that the light bulb screwed into. Loosen the wing nut, move the bracket up or down, and then tighten the wing nut again. We set ours with the bulb flush with the trim ring so we would get maximum light spread without having anything hanging below the ceiling.
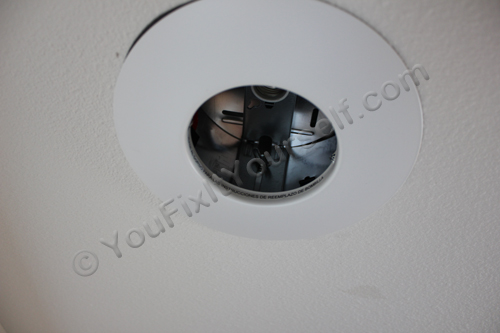
The recessed can light is installed. Now cross your fingers for luck and turn the power back on. Screw in the light bulb, flip the switch, and enjoy the light.
Return to Articles |

