
| Search YFIY |
|
|
|||
The first thing you will need to do is draw a layout of your shelves on the wall. You should measure the boxes and stuff that you plan on putting on the shelves to make sure they will fit. In this example, the customer wanted all of the shelves on one of the shelf units to be 18 inches apart. The other one they wanted the bottom two to be 24 inches each and the top two to be 12 inches each. Remember that the framing and the OSB will take up 2 inches, so if you need 18 inches then you will need to account for that 2 inches when you lay it out on the wall. We measured up from the floor 18 inches and put a line to mark the bottom of the first shelf. Then we measured up 20 inches from that first line to mark the bottom of the second shelf (18 inches plus 2 inches for the thickness of the shelf). It is hard to see in the picture below but we have lines on the walls marking where the shelves will go. 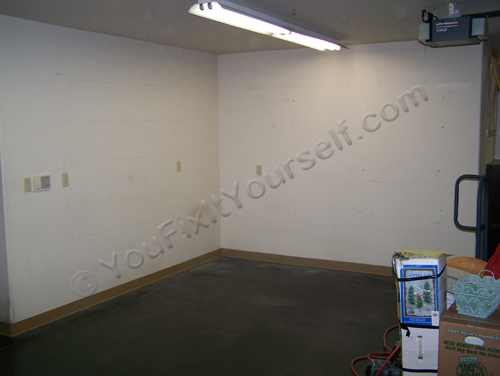
Start from the floor in the middle of where the shelf unit will be and mark the bottom of the shelves on the wall as you go up. Then use a level to draw the line to the left and right the length of the shelves. You want to mark the bottom of the shelves so you know where to attach the framing to the wall. If it is easier for you to see the top of the framing you can move your marks up 1 1/2 inches. Also mark the ends of the shelf units using the level. In our example, we started in a corner so we measured from the corner out 8 feet and then used the level to mark the end of our shelf layout lines. You need to make sure the shelf framing is securely attached to the studs in the wall so if the wall has sheetrock on it you will need a stud finder to locate the studs. If the wall you are working on doesn’t have sheetrock then you can skip this step. Some garages have sheetrock that is fire taped but not painted so you can see where the screws holding the sheetrock are. These screws aren’t necessarily centered in the stud but most of them are hitting a stud so they will get you close. If you have a stud finder you should still use it to make sure your fasteners hit the middle of the studs. Sometimes the wall between the house and the garage will have plywood or OSB under the sheetrock which will make it harder to locate the studs. Plywood and OSB do not hold nails very well so you need to locate the studs in this situation. Standard stud spacing for framing is 16 inches from the center of one stud to the center of the next. If you can find one you should be able to measure to locate the other ones. Then you can put a nail or screw in the wall at each mark to make sure they hit a stud. With your studs marked you are ready to start framing your shelves. For each shelf, cut a 2X2 and a 2X4 so that they are 3 inches shorter than the overall length of the shelving unit. Our shelf units were 96 inches long so we cut these parts 93 inches long. Cut a 2X2 for each end of the shelf that is the exact depth of the shelving unit. Ours were 18 inches deep so we cut them 18 inches long. These parts are nailed together to make a rectangle. Put the 93 inch 2X2 and 2X4 on the floor parallel to each other and then put a short 2X2 at each end. The 2X4 will lay flat so when the shelf is done the whole shelf is the same thickness. Then fasten the short 2X2s over the ends of the long boards. The picture below shows what the shelf framing should look like when it is done. 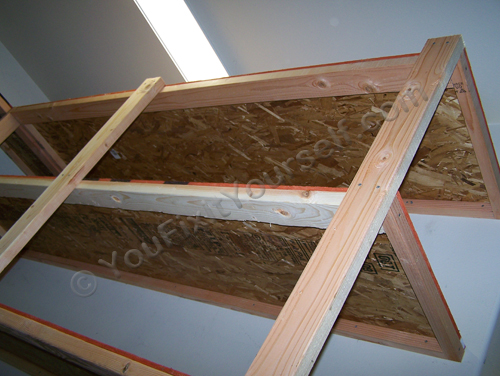
We use a 2X4 at the front edge of the shelf for added support. Without this support your shelves will sag. If you plan on having very light things on the shelves, you can use all 2X2 lumber for the framing. If you plan on having heavy items on the shelves, you can upgrade the 2X4 to a 2X6 for added strength. You can also use 2X4s or 2X6s instead of the OSB to make really sturdy shelving. Just line them up parallel with the wall like building a deck. It is best to use screws for your fasteners and pre-drill the holes for the screws so you don’t split the ends of the boards. You can build this shelf unit a lot faster with a nail gun but you will definitely split some ends. The shelves will still be strong with some splits but they won’t look as nice. If you don’t have a nail gun you can use nails and a hammer. And you can pre-drill for nails if you are using a hammer to set them. Using the 3 inch fasteners, attach the shelf frames to the walls lining up the ends with your end marks. This step is best done with two people but can be done with one. Hold the shelf frames against the wall on your line. We marked the bottoms of the shelves so we needed to get the bottom of the shelf frame on the line and then fasten it to the wall. If you are working alone you can put some nails in the wall on your lines but sticking out of the wall to hold one end of the shelf frame while you are working on the other end. Attach the 2X2 side of the frame to the wall. The 2X4 in the frame makes the front edge of the shelf stronger so it won’t sag. Once you have the shelf frames fastened to the wall they will stay in place without support as long as you don’t put anything heavy on them. Attach all of the shelf frames to the wall. 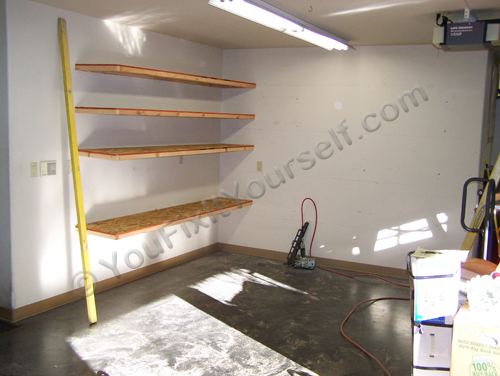
With the shelf frames attached securely to the wall you can attach the OSB to the shelf frames. Cut the OSB to the size you need for your shelves. In our example we cut them 18 inches wide and left them 8 feet long. Using the 1 1/2 inch drywall screws attach the OSB to the 2X2 against the wall first. By attaching against the wall first you take the weight of the OSB off of the rest of the shelf frame. Put the edge of the OSB that you cut against the wall and the factory cut edge out, so the edge that is showing is perfectly straight. Use the factory cut corners to line up your corners and make sure that your shelves are square. Put a screw in the corner when you have it lined up. Then continue fastening the rest of the OSB to the shelf frame. You should put a screw about every 12 inches. Remember that you can’t put any weight on the shelves until you put supports on the front edge. 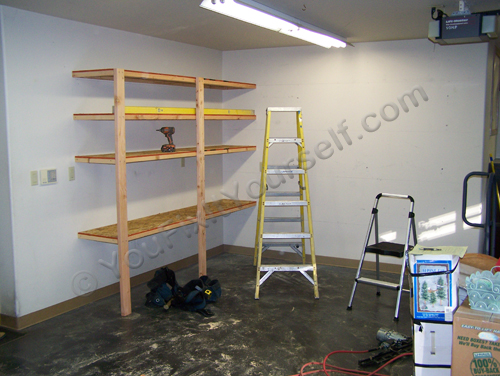
Now you need to support the front of the shelves. Hold a 2X4 against the front corner of the shelf unit from the floor up and level the top shelf from the wall out to the 2X4. When the shelf is level, mark the top of the 2X4 at the top of the shelf. Take the 2X4 down and cut it off at this mark. Put the 2X4 back up and attach the 2X4 to the top shelf using 3 inch screws or nails with the top of the shelf level with the top of the 2X4. Then level the other shelves from the wall out to the 2X4 and attach them also. Follow the same steps for the other corner of the shelf unit. For an 8 foot shelving unit you should put at least one support in the middle. Locate the middle and follow the same steps to attach the 2X4 support in the middle.  The next step is to put all your boxes and stuff on the shelves so it isn't scattered around the floor. Good luck with your project. Anytime you work with framing, you need a good set of sawhorses. We have step by step instructions for building simple yet sturdy sawhorses.
Return to Articles
|
|
|||||||||||||||||||
| Articles | Ask Eli | DYI Tips | Site Map YouFixItYourself.com © 2016 |
